- TOSIZE.lu
- Do it yourself
- DIY Projects
Creating a Stylish Floating Desk, by Jurian
Creating a Stylish Floating Desk, by Jurian
Create this project yourself with sheet material cut to size by TOSIZE.lu!
Jurian
Average
2 minutes
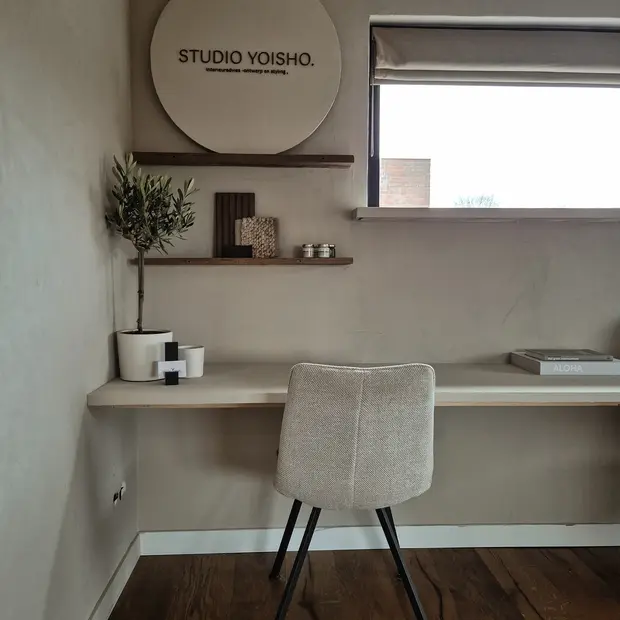
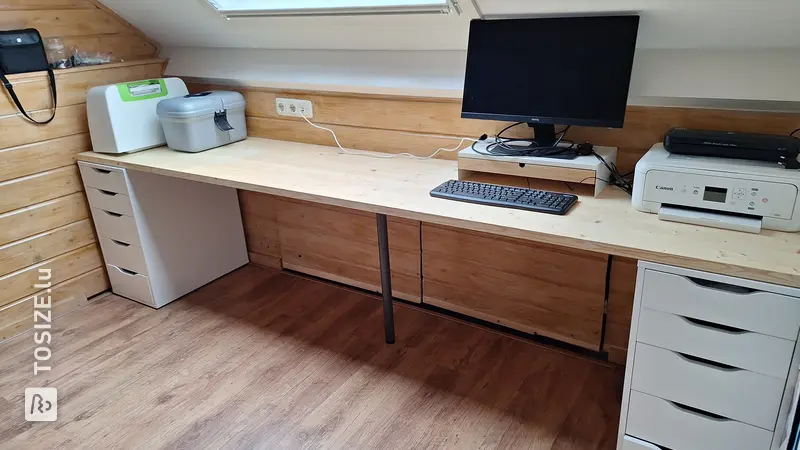
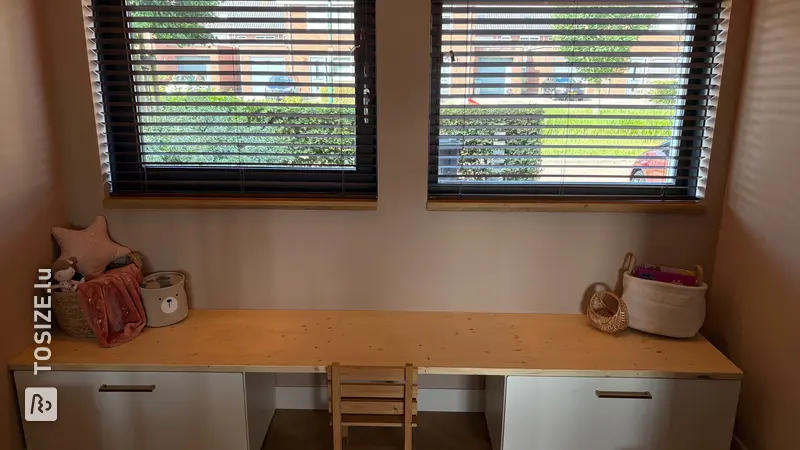
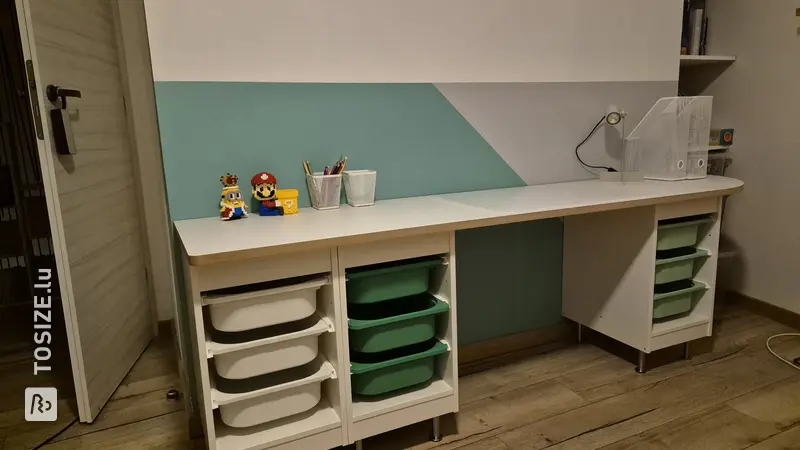
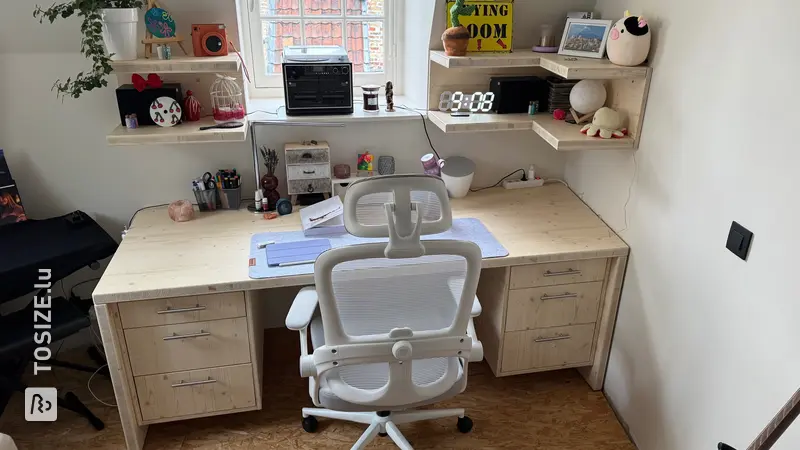
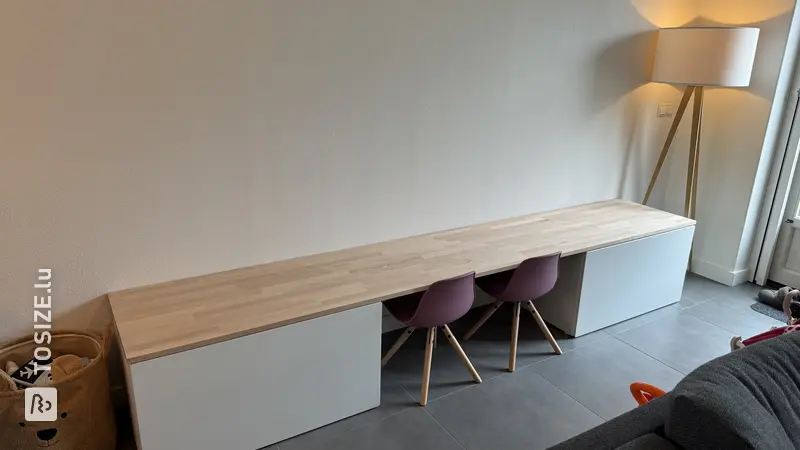
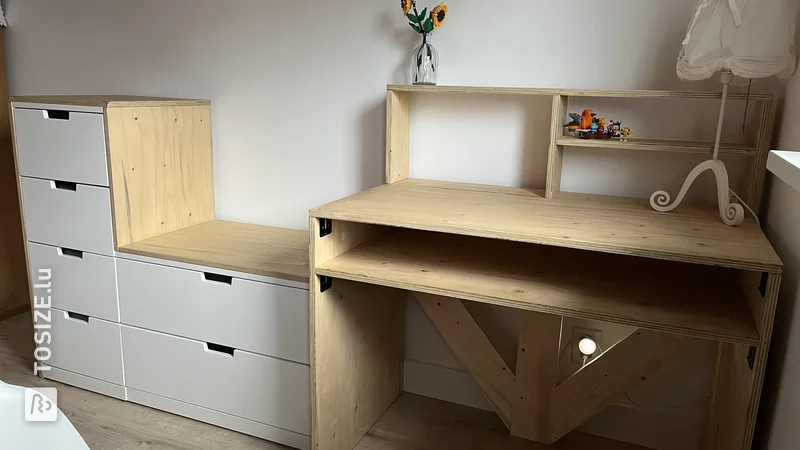
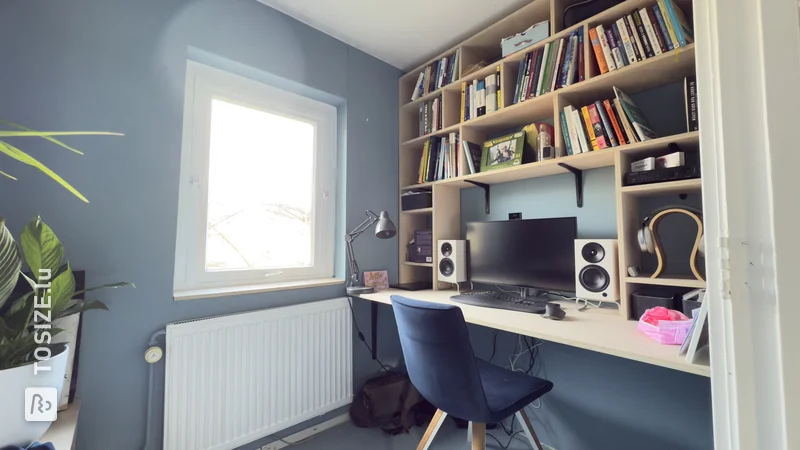
Create your own workplace
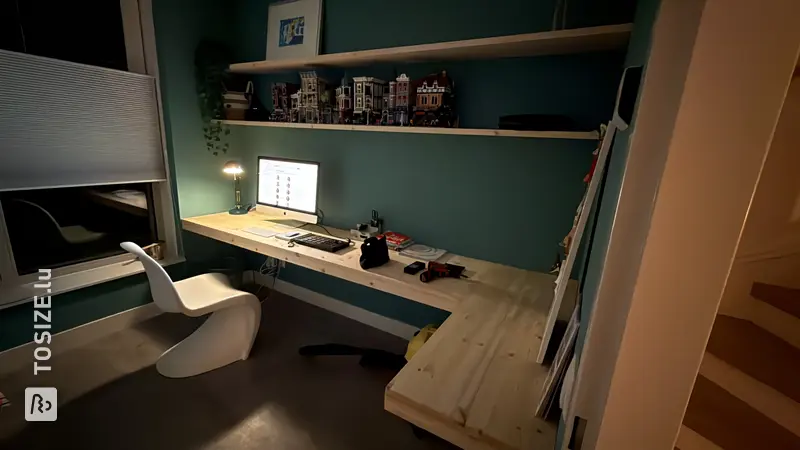
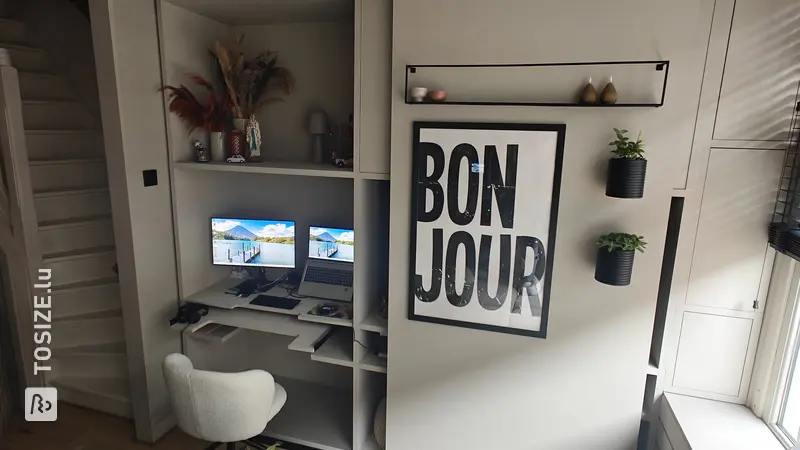
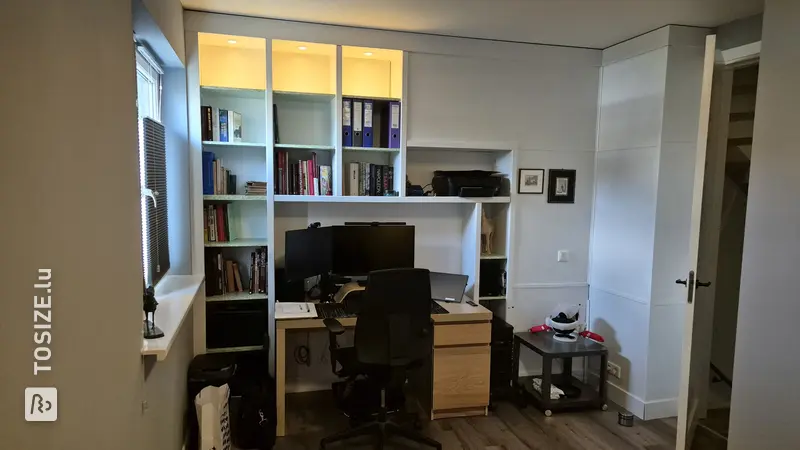
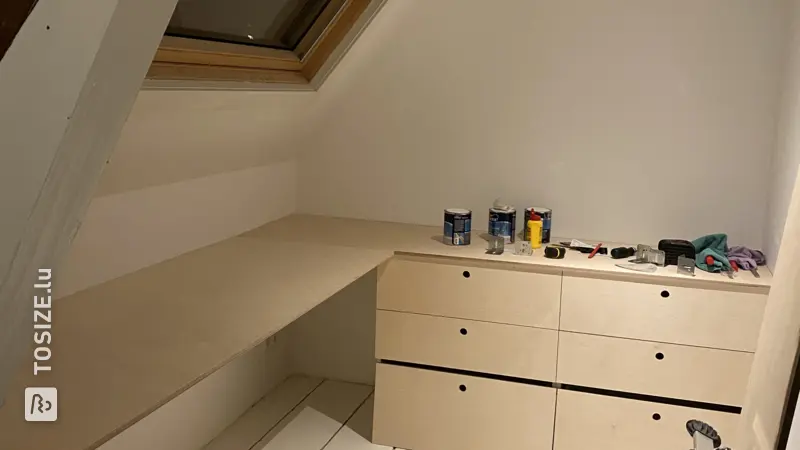
Jurian gave his home office a spectacular makeover with a custom-made floating desk. This unique project combines functionality with style and makes the most of the available space.
The design and construction
The desk features a spacious tabletop securely attached to the wall, making it appear to float in space without legs. The wood for the tabletop was custom-sawn by TOSIZE.lu, ensuring its dimensions are perfectly matched to the slightly slanted wall in the attic.
The warm hue of the desktop contrasts beautifully with the sleek, modern look of the surroundings and brings a touch of natural elegance to the room.
Placement and use
The floating desk is conveniently positioned under a skylight, which provides ample natural light. This makes it an ideal spot for productive work. Warm LED lighting along the back wall adds a touch of charm, creating ambiance and providing functionality during darker hours.
Benefits of customization
Building your own desk gives you complete freedom in terms of size and material choices. This makes it ideal for spaces that require a little something extra. Jurian chose Plywood Interior Poplar B/B for its light color and modern look, perfect for a minimalist look.
Minimalist Style
The minimalist style of the desk creates a tidy and calm workspace. The use of natural wood tones and clean lines reinforces this style, making the room feel more spacious and modern.
Properties of Plywood Interior Poplar B/B
Plywood Interior Poplar B/B offers a lightweight and durable surface, making it ideal for countertops. The material is easy to work with and has a smooth finish, giving the project a professional look.
DIY tips
Ensure a secure wall mount using sturdy brackets. This increases the stability of the floating design. Also, don't forget to sand the edges for a smooth finish.
Tip! Also check out our handy DIY tips!
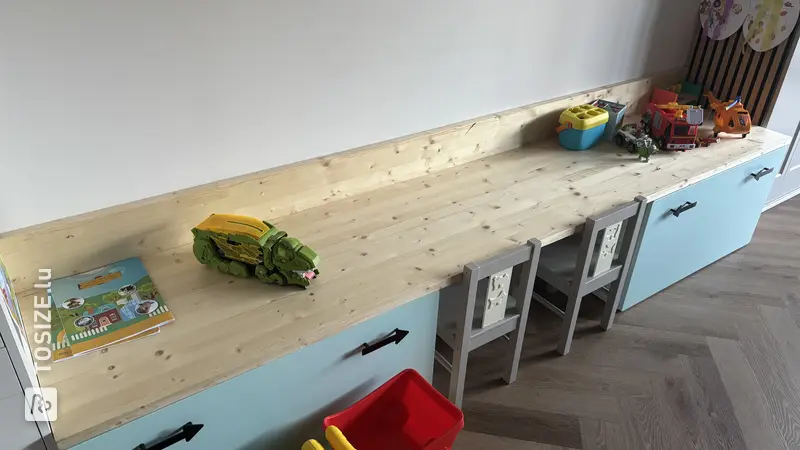
Step by step guide
Preparation
- First, a wooden frame was made for the desk (with 44x44 mm beams) that provides sufficient stability for the 3-meter-long floating desktop.
- After the frame was assembled, I ordered an MDF plywood panel from Opmaatzagen.nl. I also had a cover strip cut to size for the front of the desk and a strip for the back of the desk to easily conceal cables.
Montage
- After the sheet metal arrived, I first drilled a few holes to conceal cables. Then I sanded the top thoroughly to remove any sharp edges. I started with a coarse grit, then gradually finer grit for a smooth finish. Finally, I varnished the top twice with a clear varnish for protection and a beautiful glossy wood finish.
- After the varnish dried, I mounted the top to the frame. Then I sanded and varnished both end caps. Once these were dry, I reassembled them and varnished the desk a third time.
Finish
- Finally, I cleaned everything up and installed an LED strip behind the wall cover. I also installed a cable duct under the desk to conceal cables.
What now?
Want to make this DIY project? Check out Jurian's saw list and complete your order easily.
€425.28
All materials used
View all sheet materials
My experience with TOSIZE.lu
Order
Delivery
General experience